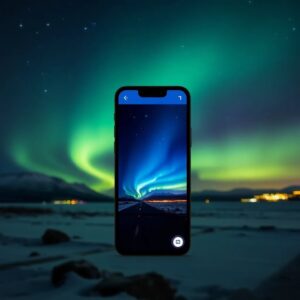
As the enchanting dance of the northern lights beckons travelers to remote landscapes, the opportunity to capture this awe-inspiring phenomenon through photography becomes irresistible. With the right techniques and a little practice, anyone can take stunning photos of the aurora borealis. Whether you are a seasoned photographer or a curious novice, understanding the essentials of night photography can make all the difference when chasing these celestial displays.
Understanding Your Camera
The most crucial aspect of photographing the northern lights is familiarity with your camera. For many, this may seem obvious, but when the auroras shimmer in the sky, it’s easy to feel overwhelmed, especially if you are using a borrowed or unfamiliar camera. Tony, an experienced aurora guide and photographer who has dedicated over a decade to capturing the night sky, emphasizes that the camera should feel like an extension of yourself. “A camera is a tool of my job, just like a mechanic has a wrench or a builder has a shovel,” he explains.
Getting Acquainted with Your Gear
Before embarking on your northern lights adventure, take the time to familiarize yourself with your camera’s settings. Spend an evening practicing in your home or backyard—turn off the lights and try adjusting the settings to see how they affect the outcome. Understanding the functions of ISO, shutter speed, and aperture will help you adapt quickly when the auroras make their appearance.
Tony advises against the common mistake of learning to use a camera in the moment, as it often leads to missed opportunities. “I’ve seen many travelers who have borrowed top-of-the-line cameras only to struggle when the auroras show up. The results are often shaky or blurry pictures, which is disheartening when you’re so close to witnessing something magical,” he notes.
Setting Up for Success
When the northern lights begin to dance across the sky, quick thinking is essential. Tony’s experience as an aurora guide means that he is always prepared for sudden changes in conditions. To maximize your chances of getting that perfect shot, consider these tips:
1. Choose the Right Location
The ideal location for photographing the northern lights should be away from city lights and pollution. Look for dark, open areas with a clear view of the horizon. Many aurora tours will take you to prime spots, but if you’re on your own, research potential viewing locations beforehand.
2. Use a Tripod
Stability is crucial for night photography. A sturdy tripod will prevent camera shake during long exposure shots. If you don’t have a tripod, find a stable surface to rest your camera on.
3. Wide-Angle Lens
A wide-angle lens is perfect for capturing the vastness of the night sky. Lenses with a focal length of 14mm to 24mm will allow you to include more of the auroras and the landscape.
4. Adjusting Camera Settings
When photographing the northern lights, the following settings are a great starting point:
-
ISO: Start between 800 and 3200. Higher ISO settings will capture more light, but they can also introduce noise into your images.
-
Aperture: Use a wide aperture (f/2.8 or lower) to allow as much light in as possible.
-
Shutter Speed: Start with an exposure time of about 5 to 15 seconds. If the auroras are particularly bright, you can use shorter exposure times.
5. Focus Manually
Auto-focus often struggles in low-light conditions. Switch to manual focus and set your lens to infinity, ensuring that the stars and auroras are sharp in your images.
Practice Makes Perfect
Tony emphasizes the importance of practice. “Don’t be afraid to make bad photos; it’s all part of the learning process,” he advises. As a beginner, you might take several shots that are out of focus, underexposed, or noisy. Analyze what went wrong, tweak your settings, and try again. The more you practice, the more you’ll understand how to adjust to different conditions, enhancing your ability to capture the beauty of the northern lights.
Engaging with the camera and learning from mistakes will ultimately lead to those breathtaking shots that you’ll be proud to share with family and friends.
The Thrill of the Chase
While capturing the northern lights can be a rewarding experience, it’s also about the journey. Traveling to remote destinations with fellow aurora enthusiasts adds to the excitement. As Tony drives groups of eager photographers through the wintry landscapes, the camaraderie among participants enhances the experience. “There’s nothing quite like sharing the moment with others as the sky transforms into a canvas of colors,” he shares.
During his tours, Tony ensures that everyone gets the opportunity to take their own photos, even as he captures stunning shots himself. “I provide my customers with my pictures, but the joy of capturing your own epic shot is something special. It’s a memory you can cherish,” he notes.
Staying Safe While Shooting
Photography in cold environments can pose challenges, and staying warm and safe is essential. Dress in layers and keep your camera gear protected from the elements. If you’re using a DSLR, be cautious of battery life—cold weather can drain batteries quickly. Bring extras and keep them warm in your pockets when not in use.
Additionally, consider the time of night and local wildlife. When venturing into remote areas, it’s vital to be aware of your surroundings and ensure you have a safe return route, especially in winter conditions.
Final Thoughts on Northern Lights Photography
As more travelers seek out the magic of the northern lights, the quest to photograph this breathtaking spectacle becomes a shared passion. With the right tools, knowledge, and practice, capturing the aurora borealis can transform from a daunting task into an exhilarating adventure. By being prepared and ready to seize the moment, you too can create stunning memories of one of nature’s most beautiful displays.
Whether you are embarking on a guided tour or venturing out on your own, the northern lights are waiting to be photographed. With these tips in mind, grab your camera and prepare for a journey into the magical realm of the aurora borealis.


